

Since I was the guy pulling this together it was up to me to come up with a scenario and determine the forces needed. I thought quite a bit about this but I really did not put a huge amount of effort into it. Since I really wanted to just get through the rules I did not want an elaborate and complicated scenario. I settled on a simple rear-guard action at a creek crossing. Basically the Confederates are holding a bridge and the Union must force a crossing of the creek.

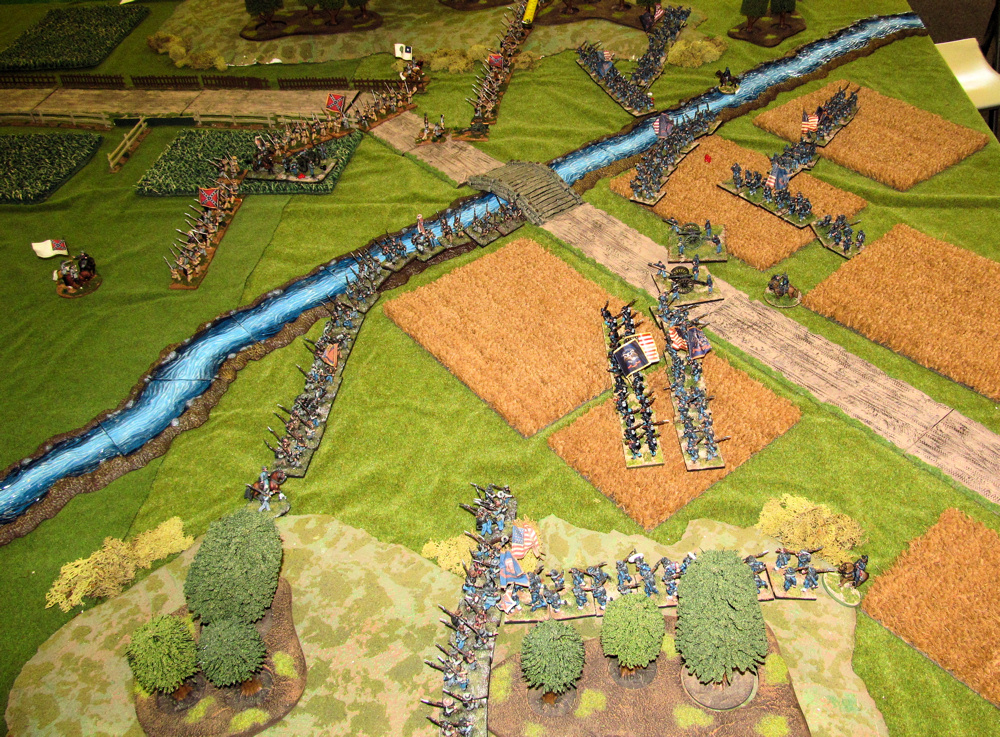
The battlefield is an 8'x6' area with the creek crossing the table diagonally. The bridge is roughly in the middle but a little closer to the Union side. The forces for the battle would be evenly matched using the basic troop and commander stats from the book. We did not use any special rules for these units. We did not allow the use of the 'attack column' formation as this was not used in the American Civil War.
Each side had two brigades of infantry, each brigade was comprised of four regiments of infantry (about 24-28 models per regiment) and one gun per regiment. The initial game-plan was for the Confederates to have one brigade deployed on the board at the start of the game. The Union forces as well as the second Confederate brigade would march on the board during their side's turn.

The idea for the Confederate deployment was to deploy on one half of the table but behind the river. I guess this didn't make that last bit clear and two Confederate regiments found their way across the river before the battle. I didn't worry too much about this at the time since I was really just happy to be playing the game finally. I would come to regret that attitude.

Tom and Joe commanded the Confederate forces with Joe commanding the initially deployed brigade. Tim and I commanded the Union forces. Tim commanded the brigade on the Union right and I commanded the left. The Union took the first turn as the attackers and had some simple deployment rules. We had to enter the West end of the table in march column on the first turn. We still had to make our command rolls and I promptly failed my first roll. Luckily, being in march column and with limbered guns I was still able to enter the table but way behind my target line and still in march column. Tim passed his first command roll but only got one move and so had the same problem.

Tim and I were both able to get our guns in action but without any real effect. It was at this point that the two Confederate regiments on the Union side of the river became an issue.

The rebels moved aggressively towards the road taking a position to enfilade anything moving towards the bridge. The second regiment was able to advance but was unable to deploy into line. Tom's brigade made a good command check and entered the East end of the battlefield and deployed into line. We was in a position to fill the huge gap on the Confederate left directly in front of Tim's brigade. At this point I felt that Tim would have plenty of time to cross the creek and establish a good defensive line.

On the Union left I saw an opportunity to catch the rebels flat-footed and deal them a heavy blow. All I needed to do was advance along the ridge line to the South and deploy into line. From there I would be able to fire into the rear of Joe's Texas regiment along the field. But a poor command roll meant the Union troops would make it onto the ridge but be stuck in march column...in the face of the enemy. I was able to deploy a second regiment into line ready to hit the Texans hard. The combined fire from this regiment as well as the brigade battery disordered and hut the Texans badly.

On the Union right things were not going as planned. Another round of mediocre command rolls meant that Tim's brigade was wading through the creek rather than setting up a defensive line on the far bank. Tom's brigade showed a great deal of aggressiveness and elan as it raced forward to close the gap in the Confederate line. Once in position his troops poured a merciless fire into Tim's regiments stuck in march column.

In the midst of the hail of fire Tim was able to deploy the brigade into line and deliver a return volley, however, the effect was minimal. Back on the Union left the rebels fired on the marching regiment on the ridge doing many casualties and disordering the unit. This would prevent the unit from deploying into line and forced the brigade commander to attempt to rally the troops. In front of the Texans I now had a regiment with one in support and both batteries. The Texans broke and fled.

With the Texans fleeing Joe charged the ridge and moved the rest of the brigade across the creek. The fight on the ridge was not going to be good for the Union. With a 6 to 1 disadvantage there did not seem to be any chance of a win and loss would have meant the loss of the brigade commander, who was attached to rally the troops. But in a turn of good luck for the Union the fight was a draw and the Union regiment was able to form up into line (though disordered).

Back on the Union right Tim was still taking a pounding. Casualties were mounting and nearly all the units were disordered. Return fire continued to be ineffective.


Tom kept up a relentless pressure and Tim;s brigade began to crack. At this point the brigade attempted to retire to the creek and dress the line.

On the Union left things were going much better. A second Union regiment joined the fight on the ridge and the rebels were driven back. The fresh Confederate regiments crossing the creek suffered heavily for their boldness. I still had both brigade guns in support on this flank which, in retrospect, may have been one of the reasons things were going so poorly for Tim.

The fight on the South ridge settled into close range exchange of volleys with the Confederated come out on the loosing side. Another regiment of Joe's brigade was routed and a large gap appeared in the Confederate line. But on the Union right Tim's Brigade had finally had enough and began to withdraw.

Joe's brigade would continue to take a pounding until it to broke and withdrew. Tom was able to redeploy his nearly fresh brigade into strong positions along the creek.

At this point both armies were broken and would have retired. Based on the scenario the Confederated succeeded in preventing a Union crossing of the creek and the Union was unable to cross and destroy the defenders so the win goes to the Confederates.
So there you have it, a great game! It looked great on the table and the rules are easy and fast. It took about three hours to play through which I think I amazing. We a definite result which is important to me. I like a game that 'ends.' I know we did a few this wrong which is expected since it was the first time any of us have played a full game. The scenario idea worked and could use some tweaks but I think it could be played again.
I WILL be playing more of this game.


.jpg)


5 comments:
Great right up Rob, I knew you would do a better job than I could. Look forward to playing this again as well!
Lovely looking game and a great AAR. We've always found that Black Powder gives a good fast game. WEll done.
Love the table mate and the game looks great.
Vinnie
Superb looking game! Great to see you guys enjoying this rule set. I look forward to more!
Thanks for the report and more pictures of the game Robert. I enjoyed the game and look forward to the next one.
Post a Comment